
Review: William Hannah Notebook
In September I was lucky enough to be sent the William Hannah Notebook for review, and I have to tell you... it was love at first sight - literally! I love my bullet journal and I'm a big fan of the Leuchtturm1917 notebooks. However, since seeing Nicole's and Cristina's disc binding journals, I really wanted to give that type of notebook a try. So, when David from William Hannah approached me, I was over the moon!
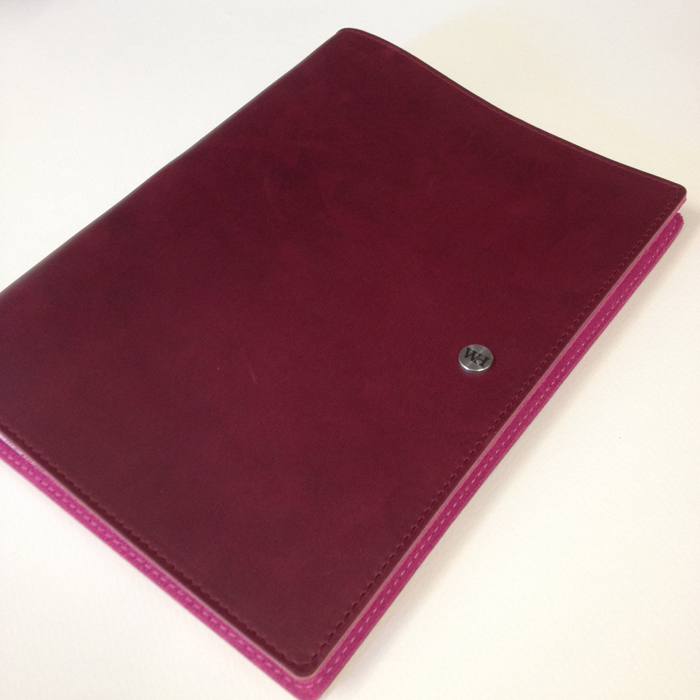
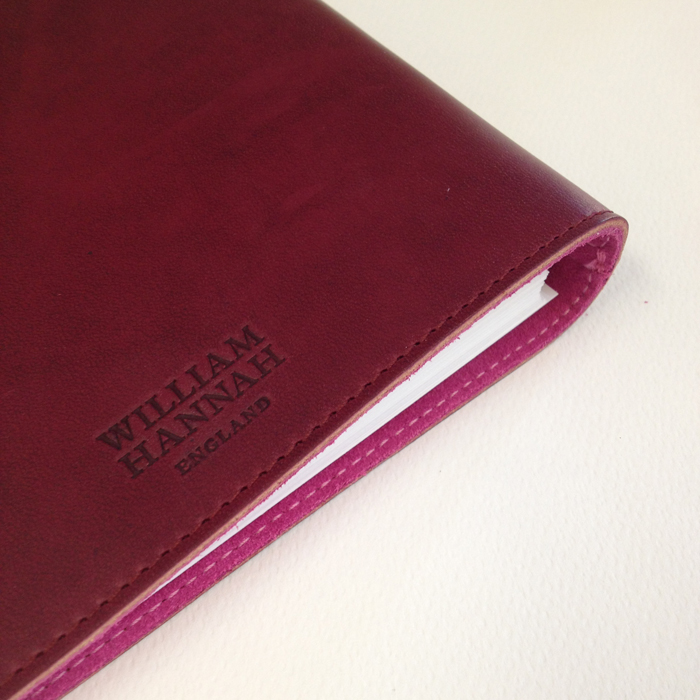
I was able to choose any combination I wanted, so even though my favourite colour is blue, I went for the Bordeaux & Fuchsia Notebook. The William Hannah is an A5 size notebook that comes in 15 amazing colour combinations. I have to say that all the notebooks look amazing and I had a difficult time deciding on which combination to go for. I must have spend at least an hour on their website deciding on the colours.
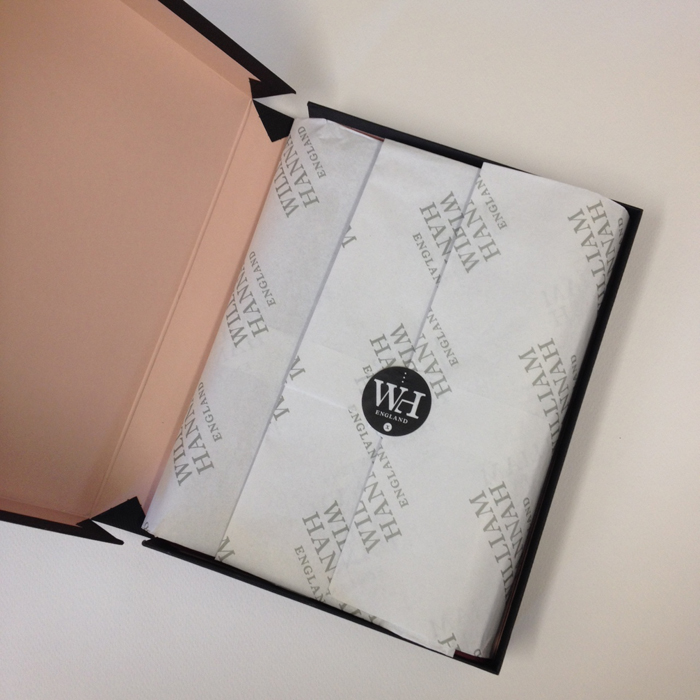
When the postman delivered the box, it felt like Christmas came early! The packaging was fantastic. It comes all wrapped up in a black box with the WH initials.
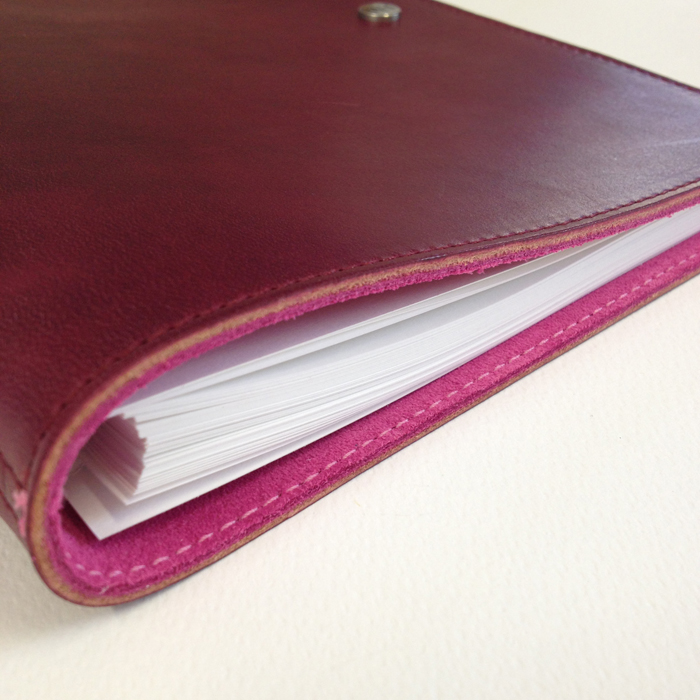
The notebook itself is absolutely amazing and of high quality. The cover is made of leather that is so incredibly soft (and smells so good!), and the inside lining is made of high quality Italian suede.
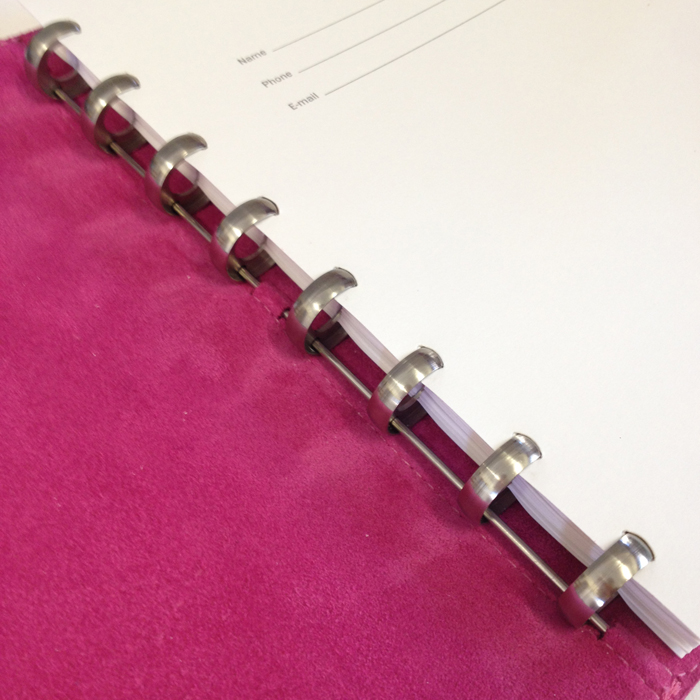
I love the metal accents that give character to the notebook.
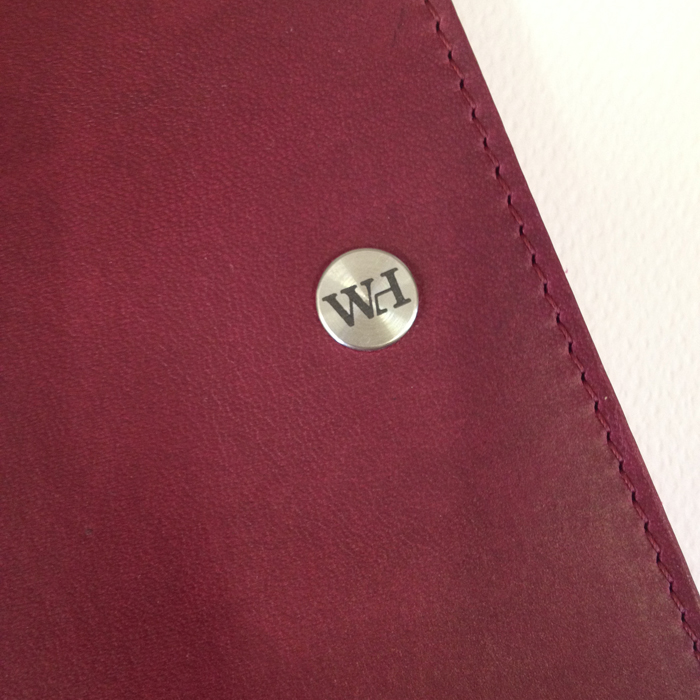
The attention to detail is exquisite!
The disc binding mechanism is made out of 303 gauge stainless steel that promises never to tarnish. I really like the stainless steel bar that they use to keep the discs in place inside the cover. That gives the notebook stability and security. That was one of my basic worries with the disc binding notebooks, but it seems that the WH Notebook won't have any problems like that.
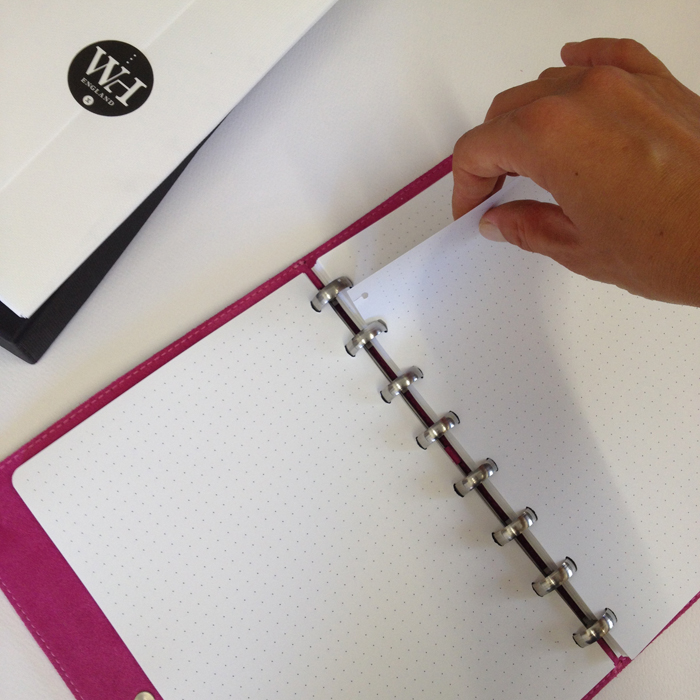
You can easily remove the paper by pulling down from the top.
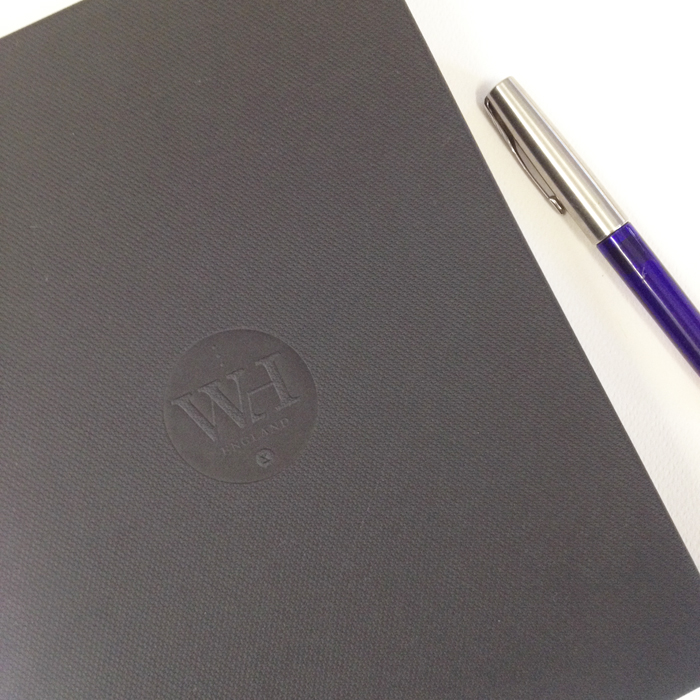
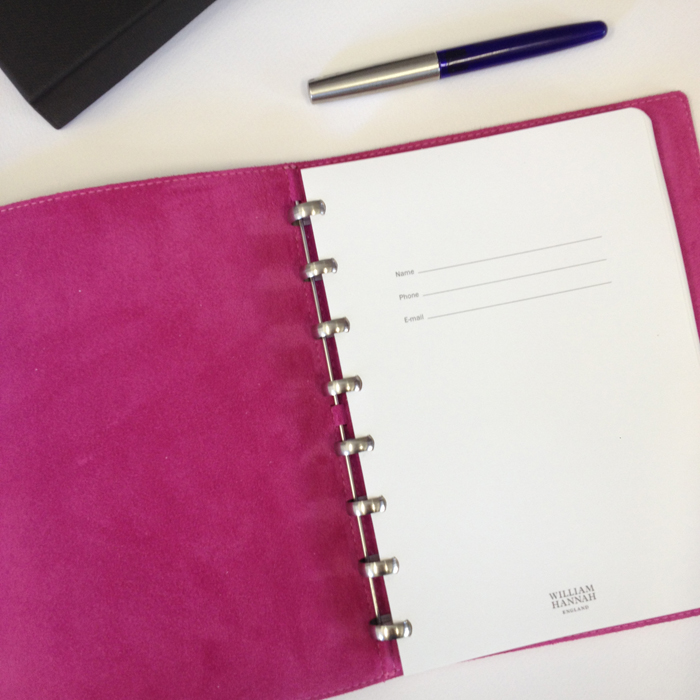
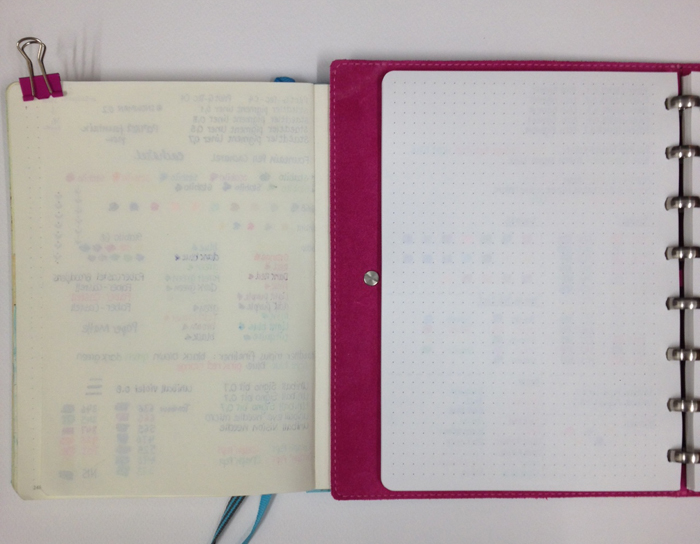
After choosing the colour of the leather and the suede lining, then you can choose the layout, quantity and line colour of your pages. The quality of the paper is amazing - extra thick 115gsm acid free luxury paper - which is so smooth that your pens literally glide on it.
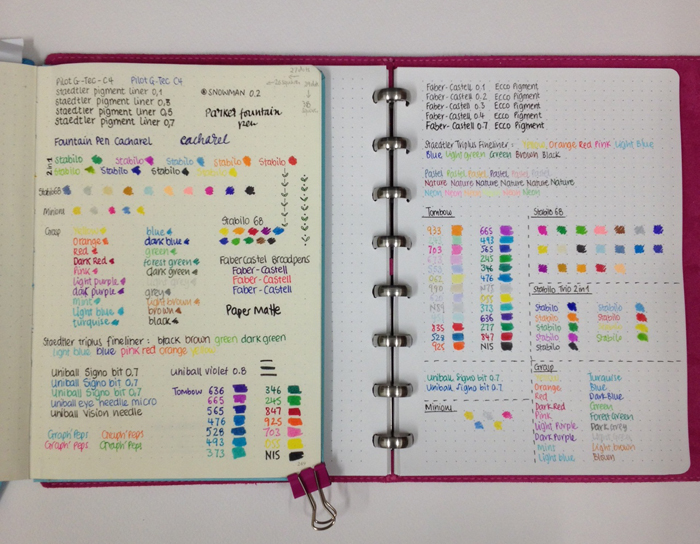
In the above page is my Pen Test Pages for Leuchtturm1917 and the William Hannah notebooks respectively. The pens write so beautifully on the WH notebook - it's a dream!
And there is literally no ghosting in the WH one! ( In the above page it's the Leuchtturm1917 on the left and the William Hannah on the right).
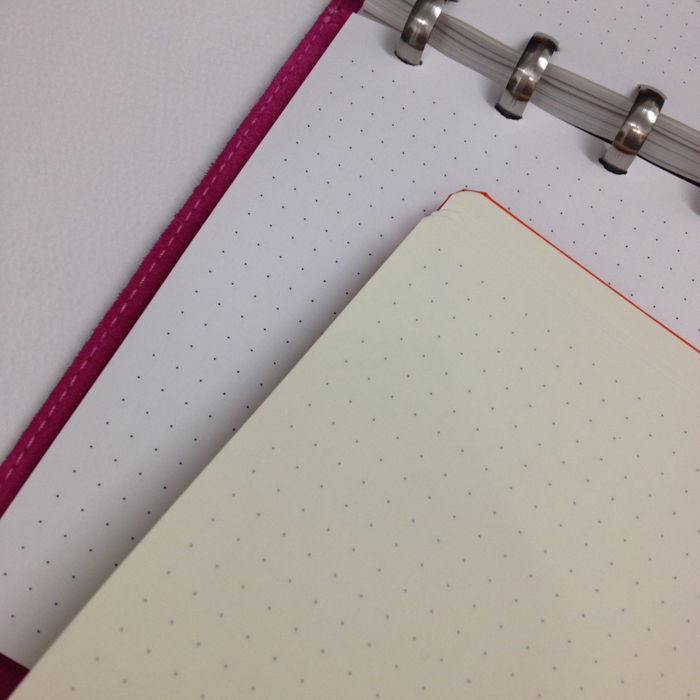
The colour of the pages is slightly whiter than that of Leuchtturm1917 - something that I personally prefer. And the space between the dots is 5mm, the same like Leuchtturm1917.
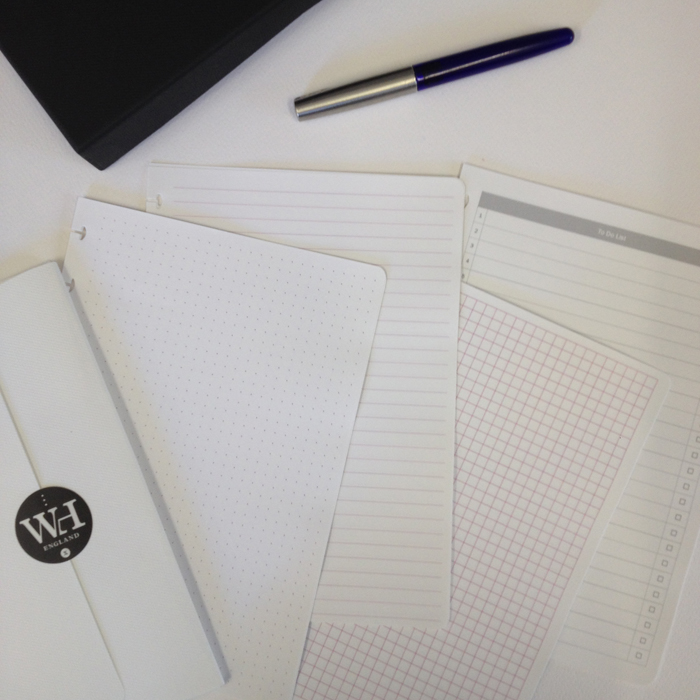
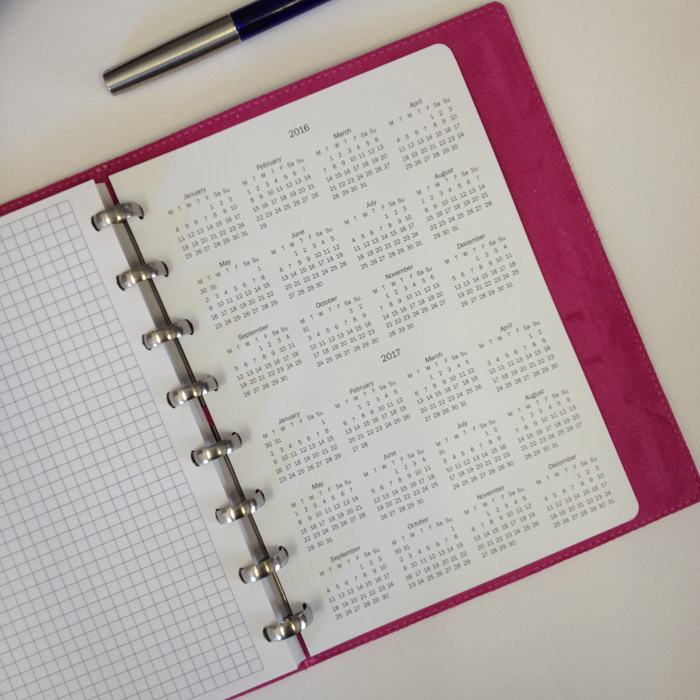
You can choose from plain, dotted, lined and grid paper. They come in packets of 10 sheets, so that you can get a variety (like I did) to try them out. You can configure it in any combination of 60 sheets (or more if you wish). You can also choose a different ink colour of your pages - if you look more closely in the above picture, I chose pink and purple for some of my pages. They also have a To-Do list and a Year at a view calendar.
As you can understand I love this notebook!
PROS
- It has great product quality.
- Excellent paper quality and thickness.
- Flexibility - you can take the pages in and out and rearrange your notebook as you want.
- Gives you the choice of separation between all the categories that you might have in your bullet journal.
- You can use it over and over again - you just need to add pages.
On the other hand though, there are some disadvantages compared to the normal notebooks.
- Price - It retails at £95 (+ shipping) which is quite expensive, but then again you get to use the notebook over and over again.
- The separation of the pages could be a bit restricting for certain types of spreads that require the pages to be connected.
- You can add a specific number of pages at a time.
For me the pros definitely outweight the cons. I trully believe this is an amazing product that you can invest on and have for life. I can't wait to start drawing and making my bullet journal spreads in it! If you like the William Hannah Notebook, make sure you put it in your Xmas Wish List ;) Don't forget to visit their website for more information.


How to create a Level 10 Life spread in your bullet journal
During the past week, I've been trying to figure out how to set up my very new and very orange bullet journal. So, I went through my previous one, and noted down all the spreads that I wanted to include in the new one as well. Even though some people might find that it's too much of a hassle to re-do some spreads when changing their journal, me personally I really like this procedure, because you also get the chance this way to do your spreads a bit differently, correct any mistakes and get inspired by all the amazing people in this community :)
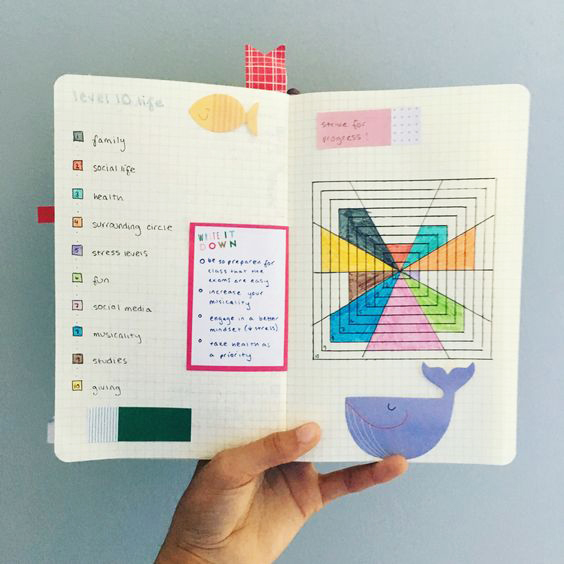
Amongst the spreads that I decided to re-do in my new bujo, is the Level 10 Life spread.

During the past week, I've been trying to figure out how to set up my very new and very orange bullet journal. So, I went through my previous one, and noted down all the spreads that I wanted to include in the new one as well. Even though some people might find that it's too much of a hassle to re-do some spreads when changing their journal, me personally I really like this procedure, because you also get the chance this way to do your spreads a bit differently, correct any mistakes and get inspired by all the amazing people in this community :)
Amongst the spreads that I decided to re-do in my new bujo, is the Level 10 Life spread. I first saw this spread in Kara's website where she was talking about it, and after that I read about it in Hal Elrod's book "Miracle Morning". ( I have a post where I talk about the Miracle Morning and the 30-Day Transformation Challenge here if you want more information). This spread consists of two parts:
- Level 10 Life - an assessment your life as it is now in 10 different areas.
- Lefel 10 Goals - getting clear on your ideal conditions for each of those areas and establishing the ways and habits that will help you get there.
My previous spread looked like this:

Even though I liked the way it looked, I wanted to try something different this time. While searching online, I saw how Kara re-did hers as well as this image by the lovely Clarissa, and decided to combine the two and create something new.

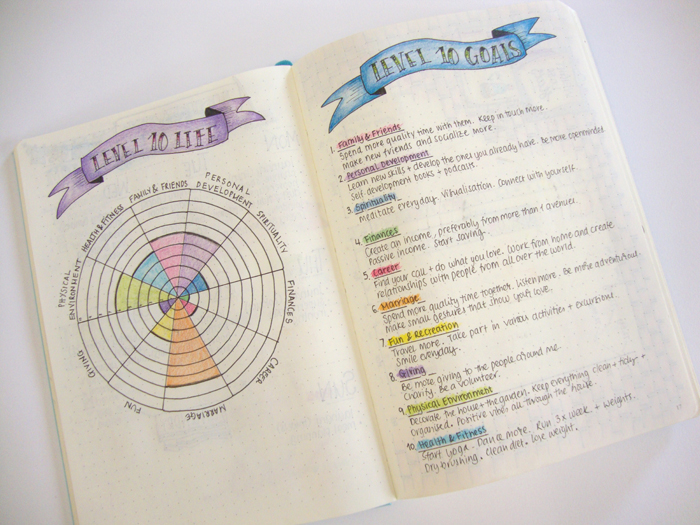
Instead of using the wheel in order to assess the different areas of my life, this time I created a graph with cubes, which afterwards I coloured in, depending on how well I thought I'm doing in each one, with different colours.

Then I filled the next page with the steps and ways that I'm planning to make each area of my life better. And this is the end result:
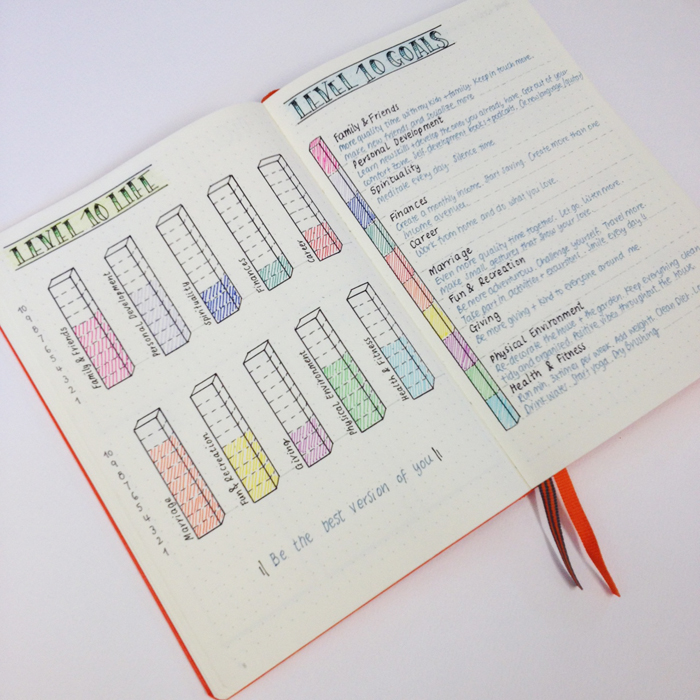
I am really pleased with how it looks, and that's one more spread finished in my new Bujo!
While searching online for inspiration, I found various ways you can do the Level 10 Life, like the following:


** I couldn't find to who this image belongs to. If you know, please let me know in the comments below, so that I can give credit **

Creative Journaling Course
Step-by-step video lessons that will help you set up and organise your life in your journal.
Have you tried the Level 10 Life?
How to make your own stickers for your bullet journal
Today I'll share with you the way I make my own stickers to use in my bullet journal. It's for those days that you just don't have enough time to doodle anything at all, but you still want to have fun and be creative with your journal. Of course you can use the same technique to make any type of stickers you want.
What you'll need:
- White Paper - I used Sketch Paper because I wanted to use watercolours with my stickers.
- Black Pen to draw the shapes you want.
- Watercolours and a paint brush - You can also use coloured markers if you want.
- Avery Clear Sticker Project Paper
- Scanner and Printer
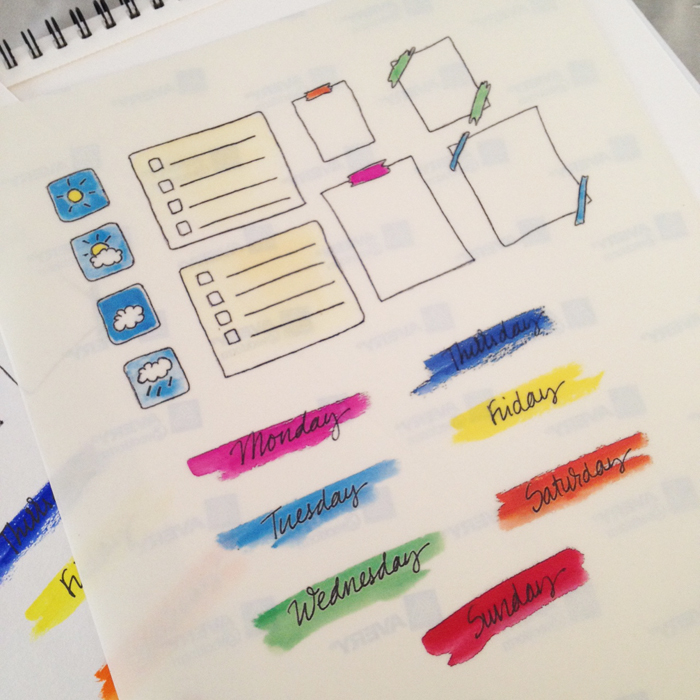
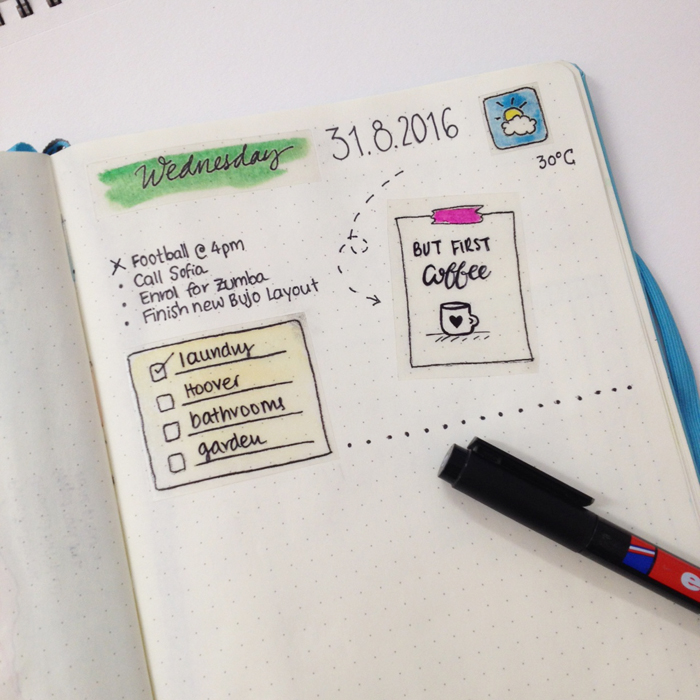
The first thing you need to do is to take a piece of white paper and make all the doodles that you think you'll need. I made some weather icons, because they can be time consuming sometimes, the days of the week with some colourful background and some fun little tick boxes, as well as some plain paper pages that you can utilise in many ways.

Once you are happy with all the doodles you've created, you'll need to scan the page and then print it on a self adhesive sheet. I used the Avery Clear Sticker Project Paper (8.5"x11"), but you can also use white sticker paper. It's really up to you. I just like to have the same colour as my notebook's pages.
Then, every time you need to use one, you can cut it with the scissors and you're done!
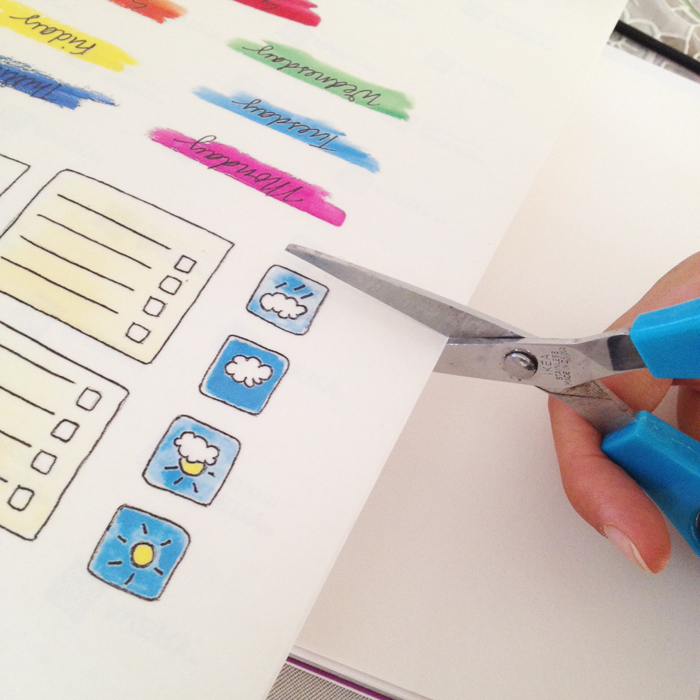
Making your daily spreads is going to be so much quicker and easier now for those days thay you just can't spare any time on being creative with your bullet journal.
** You'll need a permanent marker to write on the stickers :) **
Join now my newsletter and get the FREE Stickers Printable. Plus get access to the Library of Free Resources.


Blogging with your Bullet Journal
Back in June I decided to create a separate Bullet Journal that would be dedicated only for my blogging. I remember that I used to have second thoughts, of whether I will be able to have 2 bullet journals and manage to keep on top of them. Plus I didn't know whether I should have a daily spread on each one, or if I should have only one combining the two. Well, after having two bullet journals for almost 2 months now, I can show you how I made everything work for me. So, here's your chance to have a look into my blogging bullet journal ;)
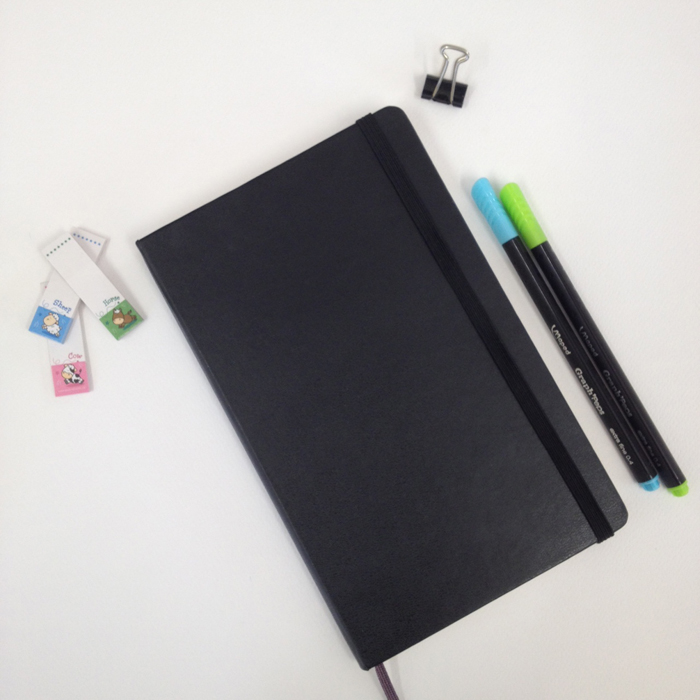
I've chosen a Moleskine Dotted Notebook in black. It has 240 pages and it's dimensions are 13x21cm. I have a post comparing it to the Leuchtturm1917 here if you're interested. I am not overly artistic in this bullet journal but I try to keep it neat and functional.
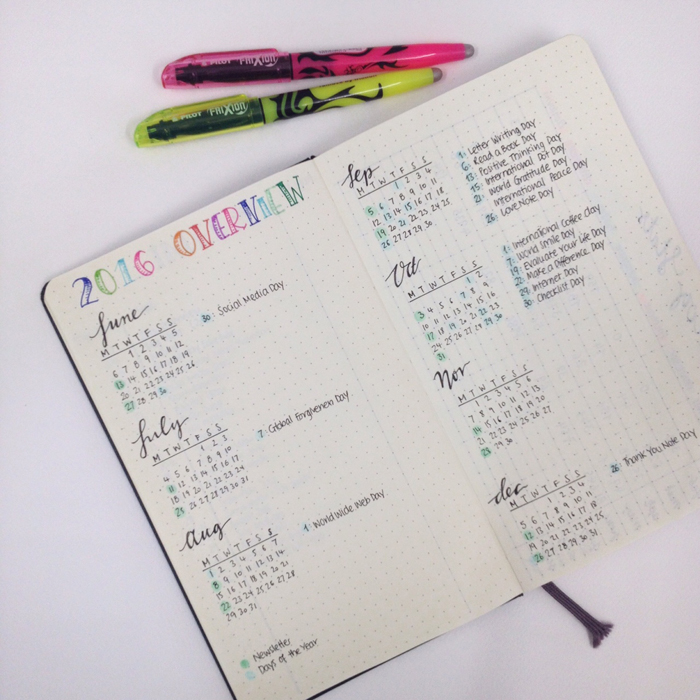
My first spread is a 2016 Overview. It starts from June, since that's when I started using this bullet journal. Here I note down some important dates, like the days that I send my Newsletter, or any other days of the year that are interesting to mention on social media, or that could inspire me to create interesting posts or spreads about.
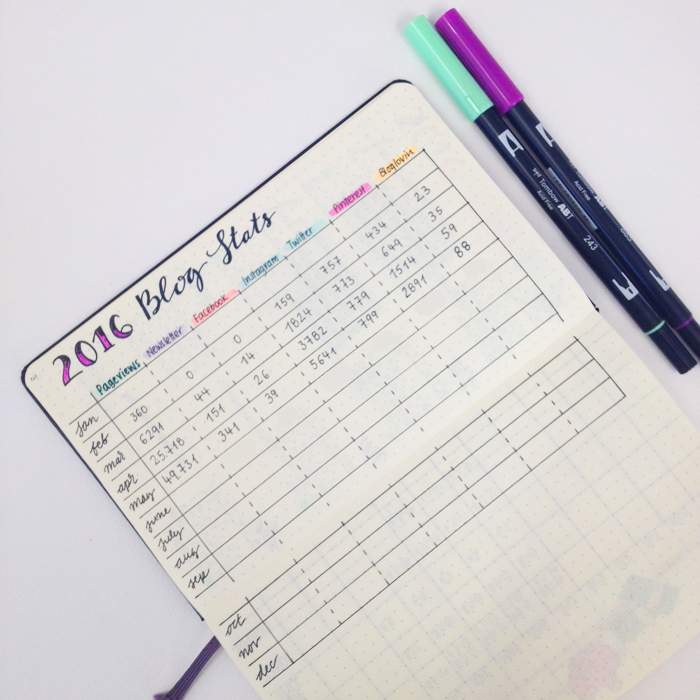
Then we move on to my Blog Stats. I like to keep track of my progress across my blog, newsletter and all social media. It helps me to be focused and motivates me to try harder.
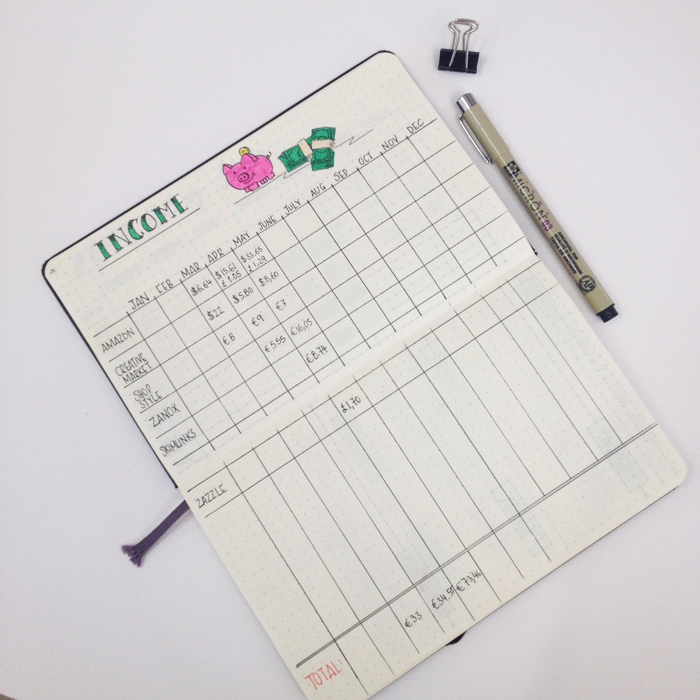
The next spread has to do with any income I make through my blog. I use affiliation links in my posts for various products and sites. They provide me with some pocket money each month, that helps me pay any expenses for my blog. If you're interested in how I monetise my website, please let me know in the comments below, so that I can make a post about it. ;)
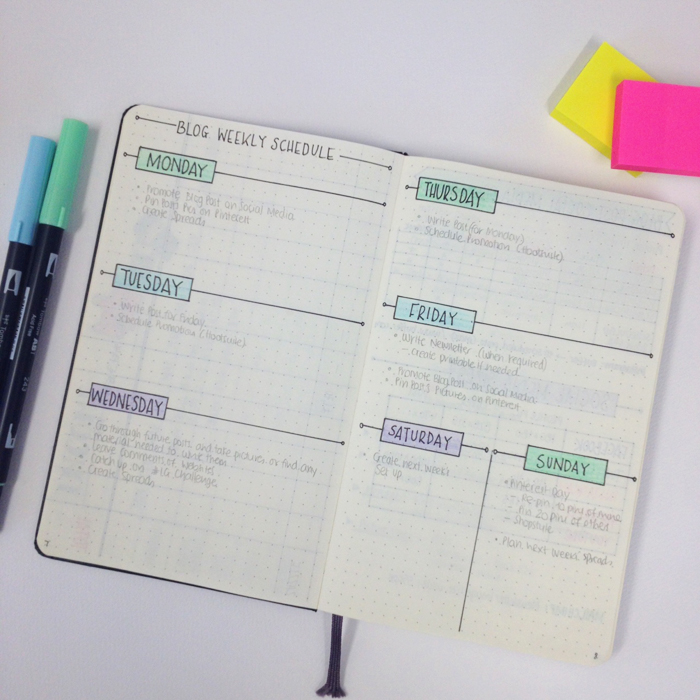
Then I created a basic weekly schedule for my blog. It helps me stay focused, but I don't necessarily follow it as it is every week. Things happen that might not allow me to have a set schedule all the time. However, I like to have a basic plan like this, so that I have a form of structure no matter what happens in my day. I still have it in pencil, since I'm not 100% sure about it yet... Keep moving things around ;)
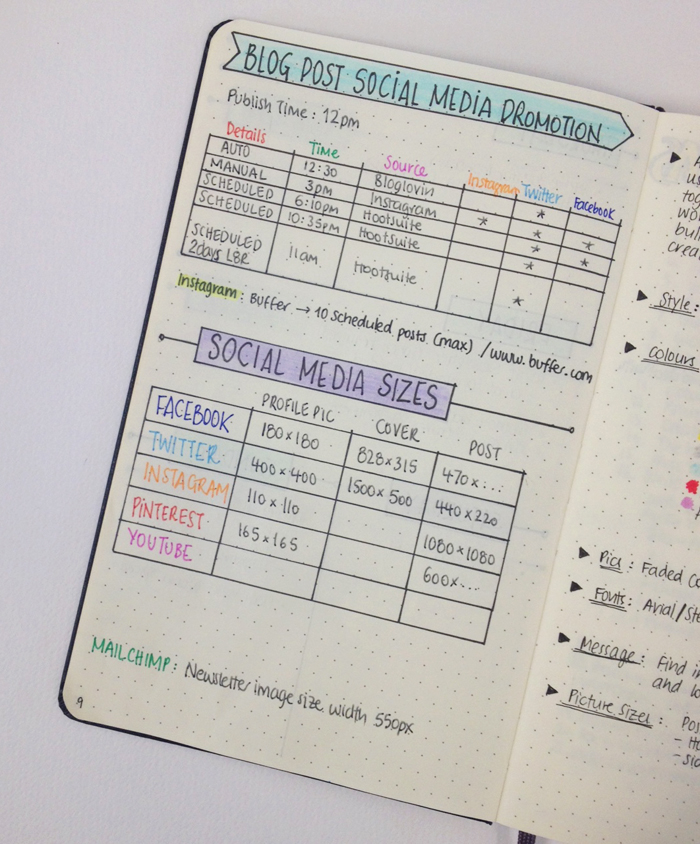
The next page has to do with social media. The top part is my promotion schedule for each post. I tend to promote each post 5 times in different times and days. So, I've created a schedule in order to plan my promotion strategy. I tend to use Hootsuite and Buffer (for Instagram).
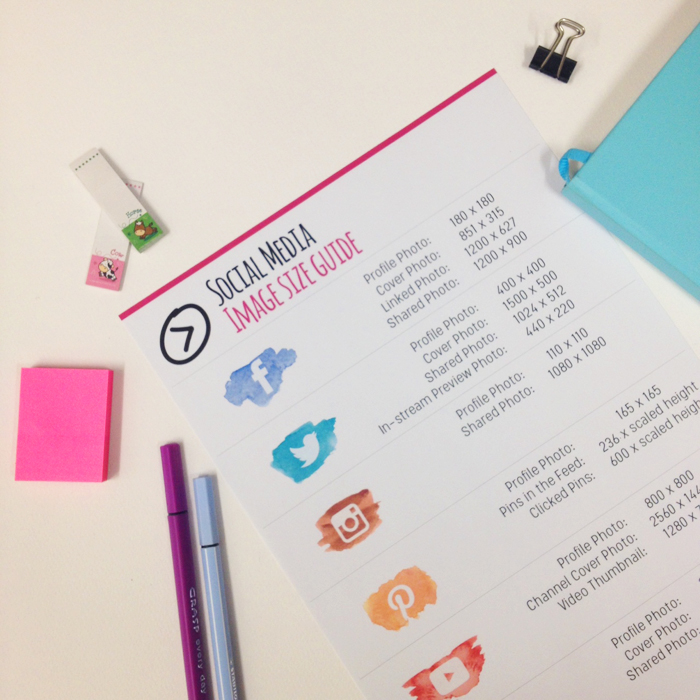
The bottom part is a table with all the social media sizes. It is very helpful when you are creating banners or post pictures that you want to promote on different social media, where each one has different post sizes.
Note: The table shown above is a bit out of date and I'm going to change it very soon! ;)
I've created a free printable with all the social media sizes for you to download, which is already added in the Free Resources Library.
Click here to join the Newsletter and get access to the Free Printable and the Resources Library.
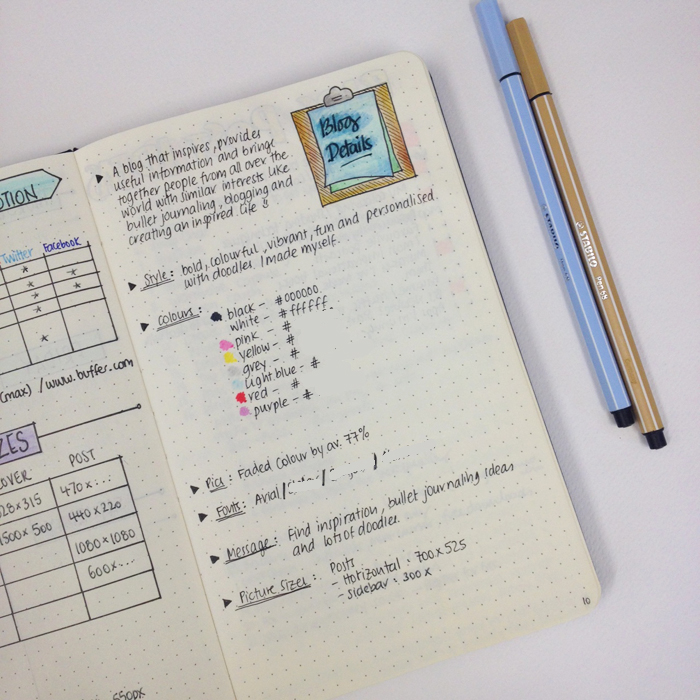
Moving further, I've created a page with all the information regarding my blog. That includes a description of what my blog is all about - sort of like a mission statement - my style, the colours I use, my fonts and the picture sizes I use on my blog (post, sidebar, pages etc.).
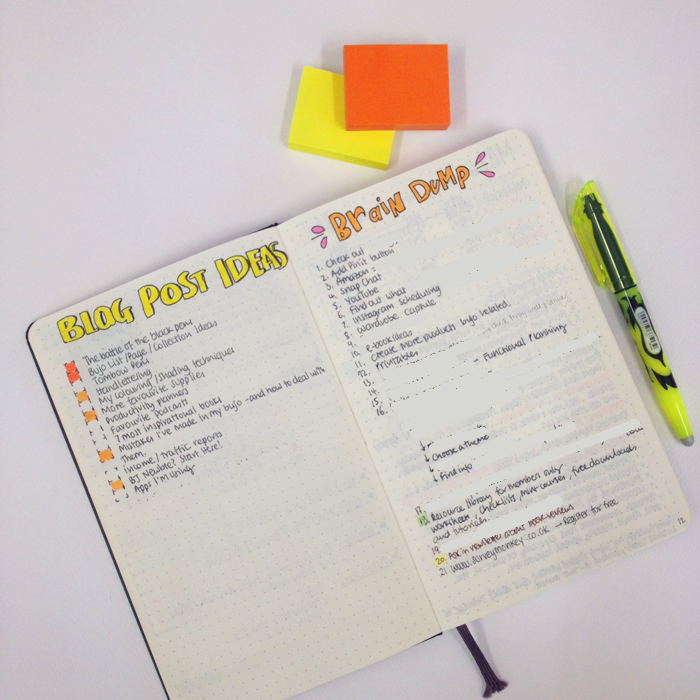
I have a list of blog post ideas, where I list any posts that I'd like to do in the future. It's very helpful as well when you're out of ideas and don't know what to write about. I also have a brain dump list, with all the things that I'd like to do, regarding my blog when I get some free time.
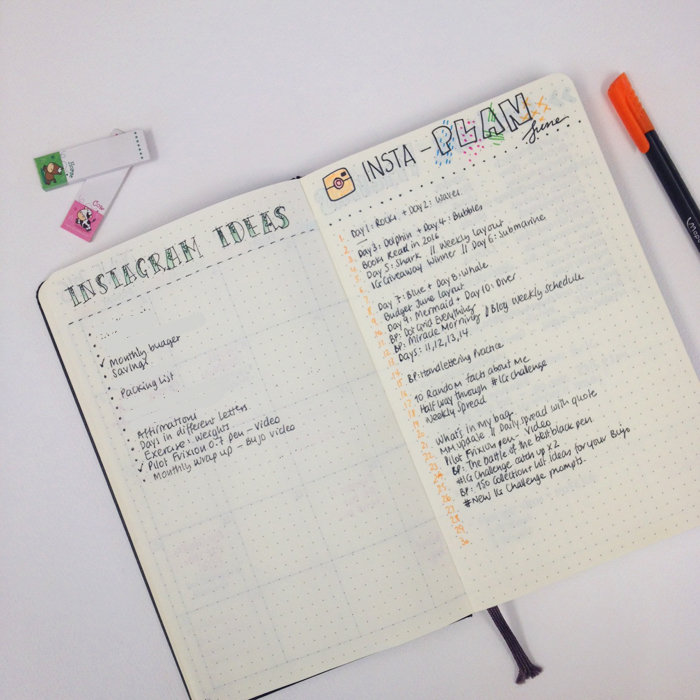
I have a spread dedicated to Instagram. On one page I write any ideas that I'd like to create and post a picture about on IG. And on the other page, I have my Insta-Plan spread that I create each month. Here I like to write down what I post each day. Sometimes I use it to plan my uploads from before. But really, I like to see what I post each month. At the end of the month, I write down next to each post the number of likes it got. This way I can see which are my most popular posts, and what my followers like to see me create and post most.
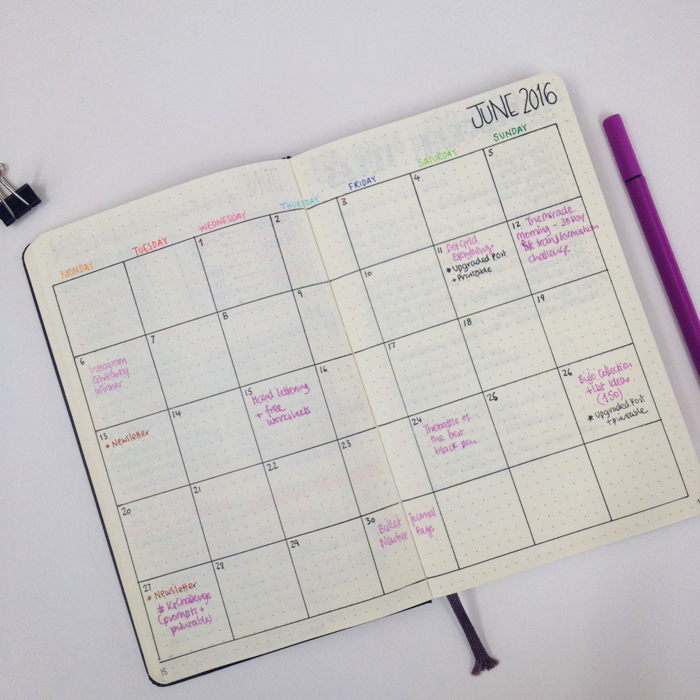
I create a month at a glance spread for each month. It is dedicated to plan my posts and my newsletters. Usually I plan all the posts for the month at the end of the previous month. However, I write everything in pencil, because I tend to change my mind or move posts around. Once a post is actually uploaded, I note it down in pen.
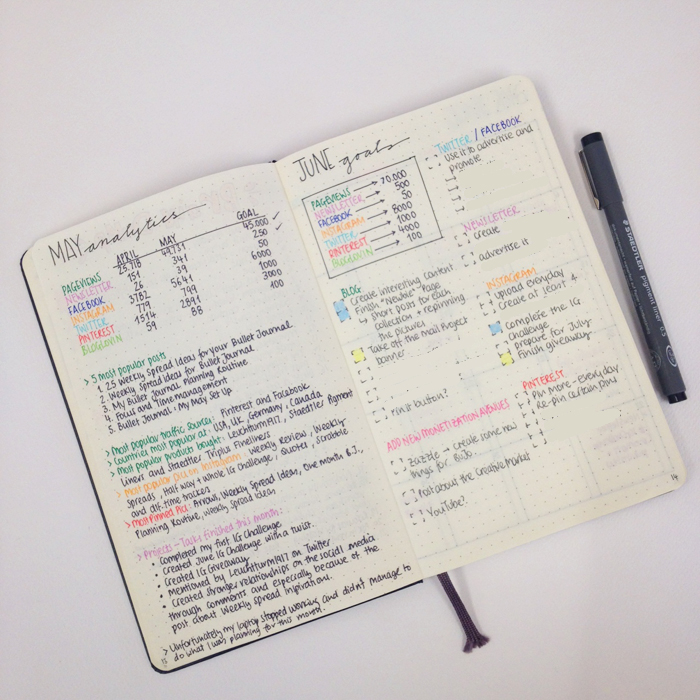
Last but not least, I create a previous month analytics for the month that just ended, and then I have my monthly goals for the month that just started. In my monthly analytics I note down all my statistics, my 5 most popular posts for the month, most popular pics on Instagram and Pinterest and all the Projects/Tasks that I finished this month. In my monthly goals I set targets for my blog and all the social media, and then I set projects/tasks for each one as well.
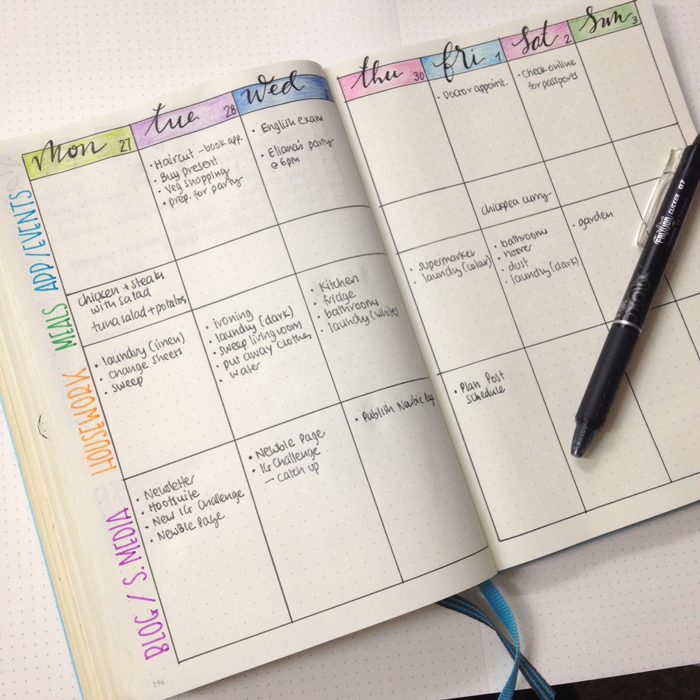
I decided to have one weekly spread combined with my personal and my blog related to-dos. I find it's better to have everything in one place. I tend to change my weekly spread around, depending on what is more important for each week, so I don't have a standard set up. In the picture above, you can see one of my weekly spreads to get an idea. :)
So, there you have it. That's how I use my bullet journal for my blog. What other spreads do you create for yours? Do you prefer to have separate bullet journals - one for your personal life and one for your work, or not?


150 Collection and List Ideas for your Bullet Journal
One of the things that I love about Bullet Journaling is the fact that is so versatile and that you can make it your own, by creating any type of collection or list you want. Since this March, that I've started bullet journaling, I have created many collections and various spreads to help me with my planning, to visualise my goals and to keep track of things. But I thought it would be nice to create a list of all the possible ideas of lists and collections I could create in my Bullet Journal, in order to take it further from the basics.
The following list was created from a research I did online, from Instagram and Pinterest inspiration, as well as from lists and collections I've already created myself. And today I'm going to share it with you.
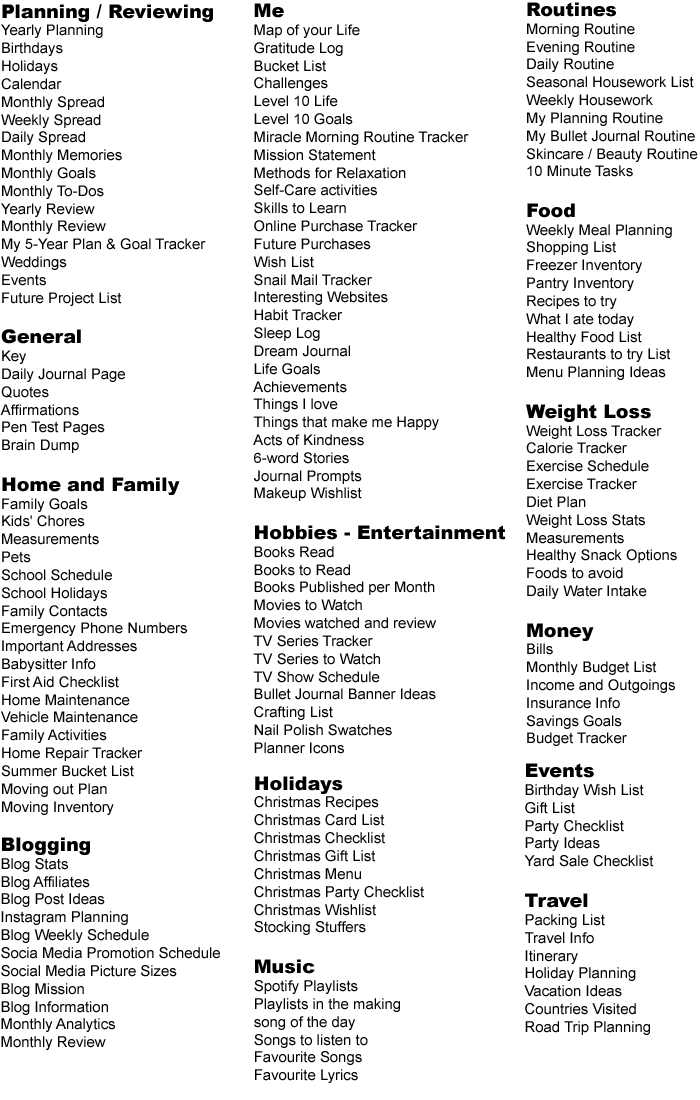

I've also created a FREE printable version of this list for you :)
JOIN THE GANG!
Subscribe now to my Newsletter to download the FREE Printable.
Plus get access to the Resources Library!
If you have any lists or collections that you've created in your bullet journal that I haven't included in the list above, please let me know in the comments below so that I can add it. ;)


The battle of the best black pen
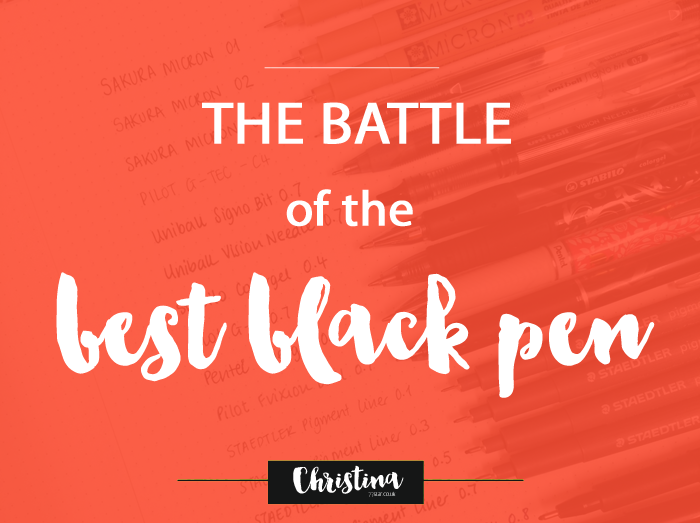
I've always been into stationary, ever since I was a little girl. I just love pens! And my obsession with black pens has escalated in the past few months, since I started bullet journaling. I am on the quest of finding the best black pen!

I have a ridiculous amount of black pens in my arsenal. But today, I will talk about the ones I tend to use the most. I have different favourites for writing, drawing and handlettering. So, let's get started.
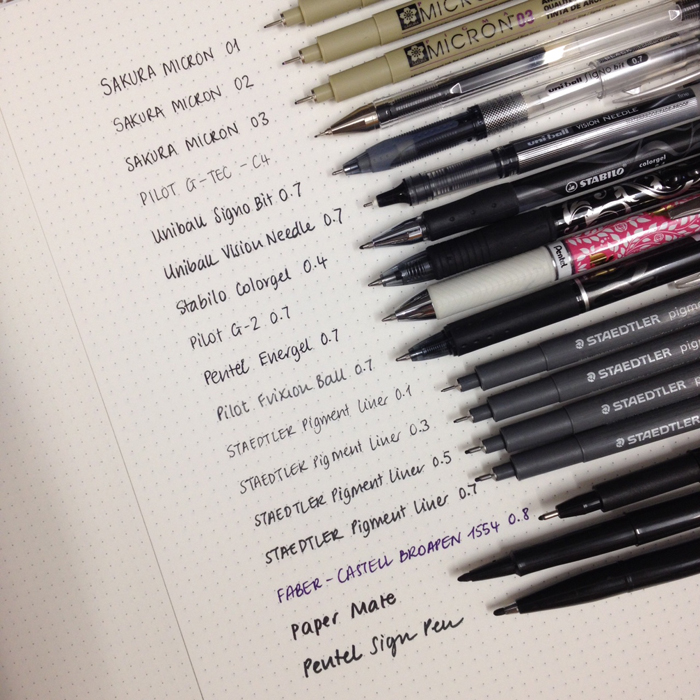
SAKURA MICRON 01, 02, 03
The quality of these pens is amazing! Very good for detailed drawing but they're also great to write too. Their black is really dark (much darker compared to the Staedtler equivalents) and I really like them. There's only one negative that I've found during the time that I've been using them. When you draw with a pencil and then you go over the pencil with one of those pens, once you're finished and you want to erase the pencil marks, then the eraser makes the marker look more faded and not as dark as it was in the beginning. That means that you have to go over it and possibly ruin your drawing, or leave it as it is. Nevertheless, I am constantly using them for drawing cause they're really good!
>> Click to Buy
PILOT G-TEC - C4
This has become one of my favourite pens to write. Especially if you make small letters, then this is the pen for you. The writing is smoothe and effortless. I tend to grab this one more that the rest lately, especially when I write my affirmations for my Miracle Morning routine. However, I've seen a lot of people draw with this one as well, like Ms. Centolife on YouTube.
>> Click to Buy
UNI-BALL SIGNO BIT 0.7
This is the pen that I always use to make my cursive handwriting on my bullet journal, or anywhere else! It glides like a dream on the paper and gives one of the darkest blacks without bleeding through the page. I just love it!
>> Click to Buy
UNIBALL VISION NEEDLE 0.7
Another great pen that I really like. Again, like the previous one it glides on the page and writes like a dream with very good pigmentation. The only downfall is that it could bleed through the page, depending on how much you press the pen when you write. That's why I don't use it for my bullet journaling. Nevertheless it's a great pen to have. It's also waterproof and fade-proof.
>> Click to Buy
STABILO COLORGEL 0.4
This one is quite new for me, but I really, REALLY like it. It's a gel pen that has a very good grip, making it very comfortable when you write. I also like the design - it's a bit different. I tend to use it for my cursive as well as when I write my snail mail letters, because it makes it so easy. If I was back to school, this would be the pen I would use to write my notes with.
>> Click to Buy
PILOT G-2 O.7
This is an old favourite of mine that I tend to grab from time to time. I find that it helps me to write more neatly and my letters look good when I use it. I have various ones around the house and in the car. If you like gel pens this is a very good one to have.
>> Click to Buy
PENTEL ENERGEL 0.7
This was an impulse buy when I was waiting at the till and I really like it. It's the pen I keep in my bag. It has a thicker grip than the Pilot one but the result is almost the same.
>> Click to Buy
PILOT FRIXION BALL 0.7
This is my new favourite toy! I use it everyday with my bullet journal, my blog journal and anything else I want to write. The reason is that it's erasable and makes my life so much easier. I just love it! After I talked about it on Instagram, a lot of the girls said that these pens are sensitive to heat, so for example, you have to make sure you won't get your journal out in the sun because the ink will disappear. However, I read that the ink in these pens will actually reappear when the temperature reaches below - 10 C (under 14 Fahrenheit), so keep that in mind too. They come in lots of colours. I have the pink, red, blue and black ones. There are also refills for some of the colours.
>> Click to Buy
STAEDTLER PIGMENT LINER 0.1, 0.3, 0.5, 0.7
These were the first liners that I started using when I was drawing and doodling and I still really like them. I don't like the way they make my letters when I write, but for drawing they are amazing. They dry instatly so there's no smudging. And I don't seem to get the same problem with the eraser as I do with the Sakura ones that I've mentioned above. Really good investment for money.
>> Click to Buy
FABER-CASTELL BROADPEN 1554 0.8
This is one of the pens that I use to do my headings with or I use it when I want to have something stand out, since it has a thicker tip. It has a very peculiar tint to it. It's a black-purple pen that I actually like.
>> Click to Buy
PAPER MATE
This is one of my old time favourites. I have various colours and I tend to use this one when I want thicker lines in my doodling, when I'm drawing quotes or when I do some handlettering. Very versatile one.
>> Click to Buy
PENTEL SIGN PEN
Like the Paper Mate one I use this one for writing quotes and doodling. They're also great to write on envelopes or boxes. It's really black and depending on the pressure you apply you can get different thickness in the lines.
>> Click to Buy
So, there you have it! These are my current favourite black pens. There's something in each one that I really like. However, I am still on the search for the best black pen. So, make sure you tell me yours in the comments below ;)

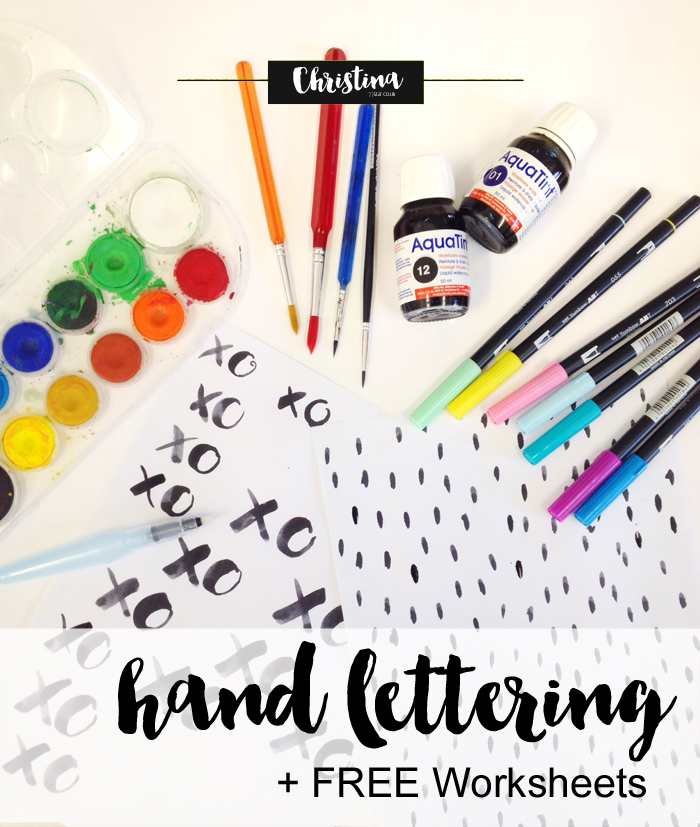
My Hand Lettering Practice + Free Worksheets
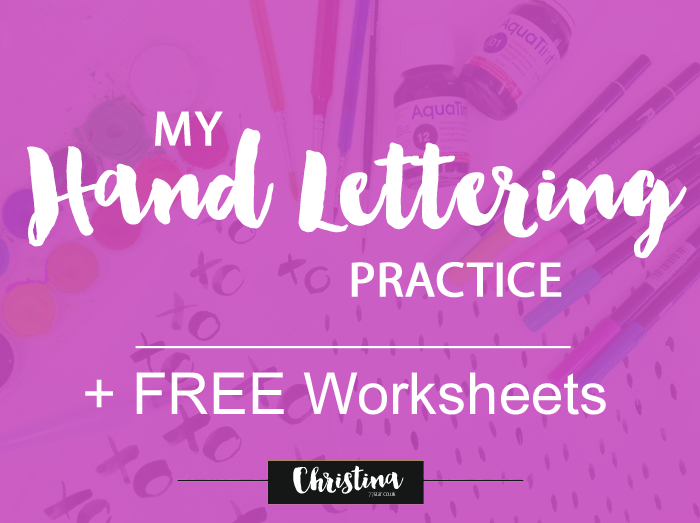
Since last year I've been obsessed with hand lettering. I took the 30 Days to Better Hand Lettering Course by Caroline from Made Vibrant, which I loved. I bought countless markers, brushes and pens, including a set of Tombow markers. And for a few months now I've been practicing like crazy.
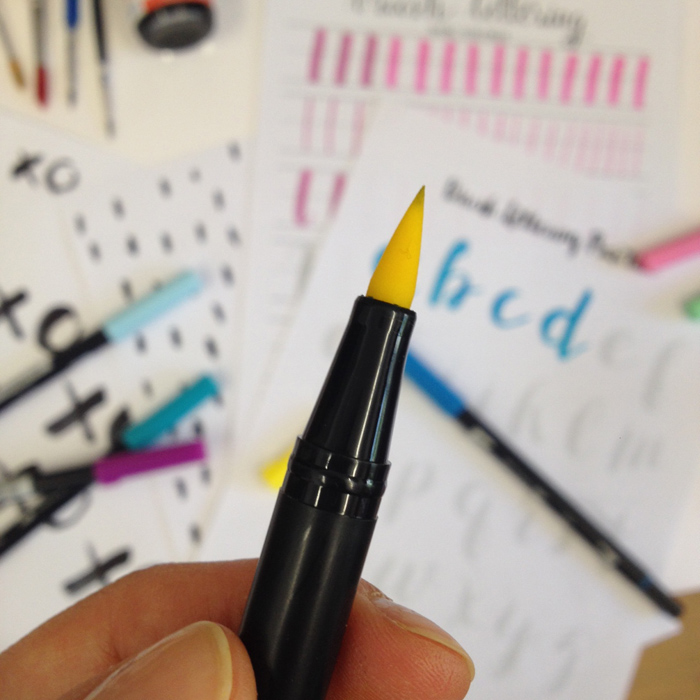
As far as hand lettering is concerned, practice, practice and more practice is very important! And you have to start from scratch. Not from the letters and the alphabet, oh no. But from the lines, the midstrokes and the coils. You won't believe how frustrating it is trying to perfect your uperstroke - arghhhh!
To my quest to perfect my hand lettering, I've found loads of free worksheets online that I've printed quite a few times and I set myself once or twice a week where I practice for an hour. I would love to practice almost everyday, but my current schedule doesn't allow me to do so. But, even the two hours per week have done wonders to my hand lettering!
The following are 4 sets of practice worksheets from some amazing websites I found online and that I've spend countless hours going through many of their posts on hand lettering. I've printed them many times and practice with them over and over again.
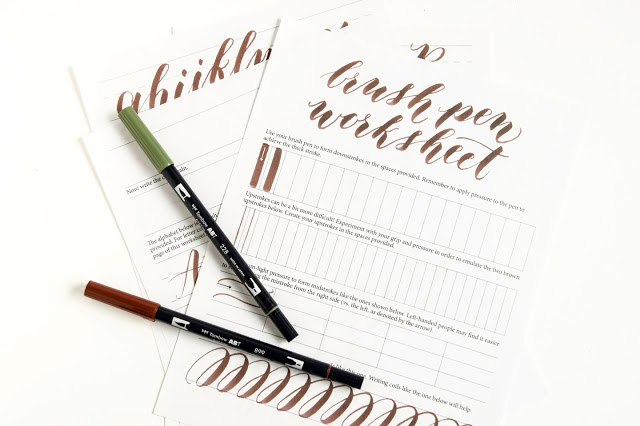 |
| The Postman's Knock |
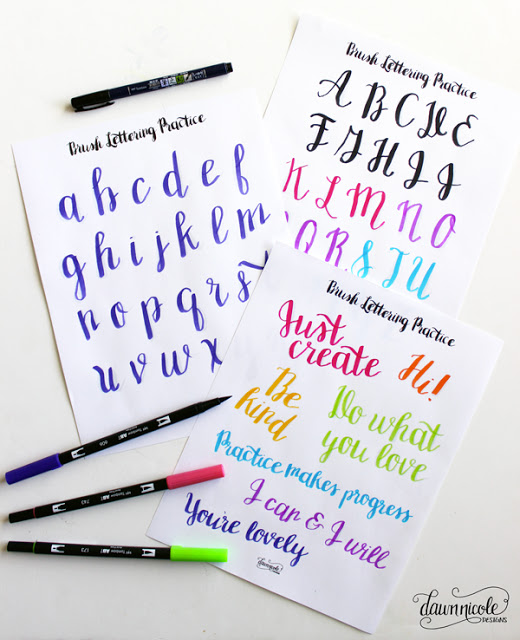 |
| Dawn Nicole Designs |
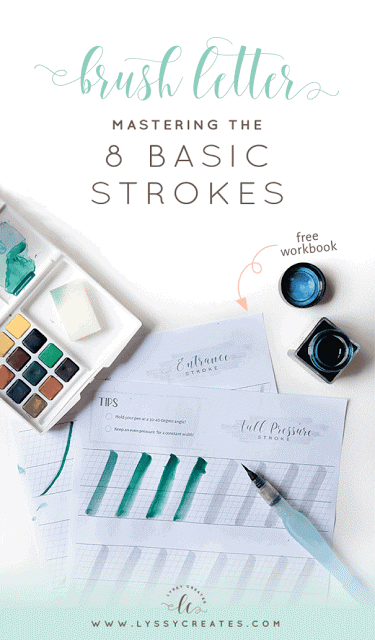 |
| Lyssy Creates |
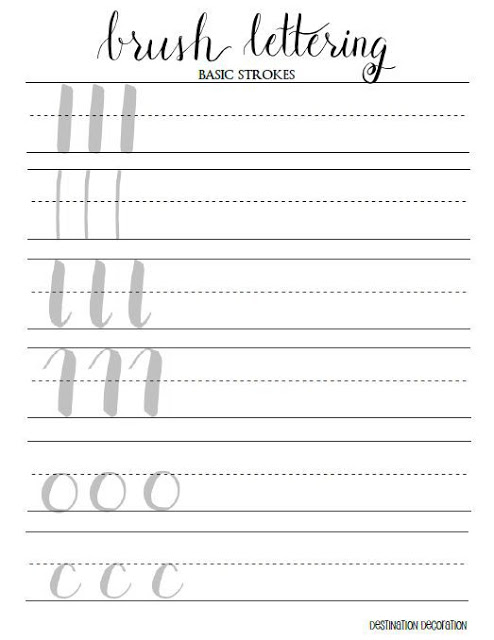 |
| Destination Decoration |
One more amazing blog with everything you need to know about handlettering and calligraphy is the Destination Decoration. Elizabeth has some very detailed posts and videos to guide you along. You can download her basic strokes worksheets here.
I've been really enjoying learning hand lettering and I intent to continue practicing. I'm thinking of joining Liss's Freestyle Calligraphy Online Course. She is amazing! I'm also thinking of taking part in one of those Hand Lettering Instagram Challenges next month. Have you taken part in any of those?

The Miracle Morning - 30 Day Life Transformation Challenge
After reading Hal Elrod's The Miracle Morning book, I am ready for the 30-day Life Transformation Challenge that he sets in it. Once you read the book, you basically go through certain steps where you answer some clarity questions, you assess your life with the 'Level 10 Life' wheel and then you go on and set your Level 10 Goals.

I created a two page layout in my bullet journal, as I've seen it in Kara's website, but I also have 3-4 pages of more detailed Level 10 Goals in it as well.
The book shows a simple approach to achieve what you've ever wanted, by having a specific morning routine that includes Silence, Affirmations, Visualisation, Exercise, Reading and Scribing.
I already have a similar morning routine, where I dance and meditate and lately I tried to incorporate some visualisation too, but this is more focused and intense since there are specific steps and it's done every single day. I am up for giving myself some challenges and therefore I decided to do it starting from tomorrow, Monday the 13th of July 2016 (why wait until next month?)
So, for the past two days I've been trying to set myself ready. I always believed that the more prepared you are for something, the less likely it is that you'll mess up and fail. I took each step separately and made sure I have everything I'll need for it.
SILENCE
For this part of my morning routine I'll be meditating for 10 minutes. I've been using Headspace for quite some time now, but I wanted to add something else as well and I found a new application called Calm where I'll try their 7 Days of Calm program before deciding if I'll pay for it monthly.
AFFIRMATIONS
I wanted to create a page with affirmations that was as personal to me as possible, instead of finding various affirmations online each day. My goal was to have a set of affirmations that I can read all together as one paragraph, or that I can choose one, if I want, each day to repeat as a mantra. So, I came up with the following being inspired by Louise Hay, Hal Elrod, Pam Grout and many online resourses:
- Something amazingly awesome is going to happen to me today.
- This is going to be a great day.
- I make today the best day of my life, because there is simply no good reason not to.
- Today I will take one step towards my dreams.
- I create beautiful experiences.
- I am in charge of how I feel and today I choose happiness.
- I am committed to live in constant joy. Joy is my natural state.
- There is nothing to fear.
- Life emanates from me. I create the world with my thoughts, my beliefs, and my energetic frequency.
- I already have everything I could ever want or need.
- The universe has my back and is constantly sending me blessings, gifts, signs and guidance.
- Making money is easy.
- I can afford anything I want. In fact, I am so prosperous, I never need to worry again.
- Things always work out for me.
- I am successful in everything I do.
- What I think, I create.
- Amazing opportunities exist for me in every aspect of my life.
- I deserve the best and I accept it right now. All my needs and desires are met before I even ask.
- I am just as deserving of extraordinary happiness, health, wealth and success as any other person on this planet!
- I am loved.
- I am the best mother I can be.
- I am blessed with an amazing, loving and supportive family and loyal, kind and understanding friends.
- I am creative, smart and talented. I love to inspire people.
- I am strong and confident.
- My body is filled with energy.
- I love my body and I take care of it every day filling it with nutritious food and by exercising.
- I listen to my body and give it what it needs on every level.
- My body is peaceful, healthy and happy, and so am I.
- My mind and body are in perfect balance. I am a harmonious being.
- I relax and enjoy life. I know that whatever I need to know is revealed to me in the perfect time and space sequence.
- I am grateful for all that I am, all that I have and all that I experience.
- I am grateful for my beautiful life.
- I am whole and complete.
- All is well in my world.
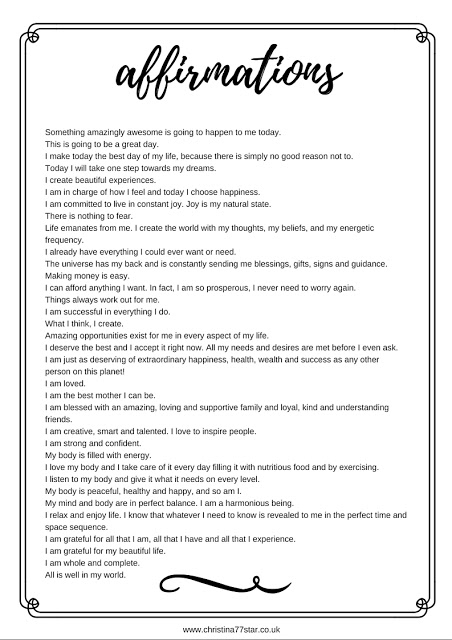
I wrote them in my bullet journal and I've also printed them and I have a copy in my office and by my bedside table. I've created a FREE printable for you too!
JOIN THE GANG!
Subscribe now to my Newsletter to download the FREE Printable.
Plus get access to the Resources Library!
VISUALISATION
I wanted to create a two page layout in my bullet journal, but I don't want to rush it. I want to take my time and create something special. But in the meantime, I've created a Visualisation Board on Pinterest that works just fine for now.
EXERCISE
As far as my exercise is concerned, I was already working out on average 3-4 times a week. So, the plan for the next 30 days is to run 3-4 times a week following the 5K Runner App. that I had stopped using and then started all over again two weeks ago. The rest of the time, I am going to walk for 30 minutes and then do some weight lifting exercises and some squats. Once I finish with the app, I'm going to be going swimming everyday for an hour - which I love and I can't wait!
READING
For the reading part of this morning routine I decided to finally read the book Think and Grow Rich by Napoleon Hill, that I've been meaning to do for some time now. I am going to be reading 1-2 chapters per day. After that, I'll continue with the Big Magic by Elizabeth Gilbert.
SCRIBING
I am excited about this part of the morning routine, but I am also worried about it. I like to journal and write, but I am not consistant and in the past whenever I tried to write every day, I gave up. So, this time I am determined to make it work. I already have my notebook dedicated for my writing ready - it's a pale yellow Moleskine Journal cahier squared. I decided that for this part, I can do one of the following so that I always have a choice:
- Write about whatever I want that day.
- Write my affirmations or the affirmation that I've chosen for that particular day lots of times.
- Choose one of the prompts from this journaling prompt list I found online, that looks really interesting.
My schedule for my morning routine will be:
WAKE UP AT 5am
SILENCE: 10 mins
AFFIRMATIONS: 10 mins
VISUALISATION: 10 mins
EXERCISE: 40-60 mins
READING: 15 mins
SCRIBING: 15-20 mins
And I am ready! You can get your copy of Hal Elrod's 'Miracle Morning' book here. If you'd like to join me in this miracle morning life transformation challenge, please leave a comment below so that we can support and inspire each other. :)
What is your current morning routine?
