
The Craft Planner Review

If you’ve been following me for a while, you’ll know that I’m always searching for ways to be more productive and efficient with setting up my goals and see them come to life. Finding simple ways that will help me with my time management and staying on schedule with the various projects.
The problem that I always tend to have is that I start planning for a project and I’m very enthusiastic about it. Then I get confused with all the steps I need to take, when I need to take them and in the end I get flustered and frustrated because I feel completely lost and I’m out of schedule… Raise your hands if you’ve gone through the same scenario before…. Hopefully I’m not alone in this!
While I was on holiday, I was contacted to review the Craft Planner and after I quickly checked their website, I said yes straight away!
What is the Craft Planner?
““The Craft Planner is a unique way of accomplishing your goals easily. With the right kind of planning, you can build on small goals to lead to big accomplishments. With a simple and focused layout, the Craft Planner will help you to stay on-task so that you can keep your momentum going, follow your schedule closely, and remember what matters most to you. The Craft Planner is more than just a planner: it is a partner in your success.””
How it works?
According to the website you only need to take 2 simple steps with the Craft Planner for successful goal planning.


Since the planner is not available yet and I only had some pages to play with, I decided to see how I would use it for a project and try and see for myself how it works. Following the instructions, I started planning for my pretend project, which for the sake of this experiment was to 'Launch my Etsy Shop'.
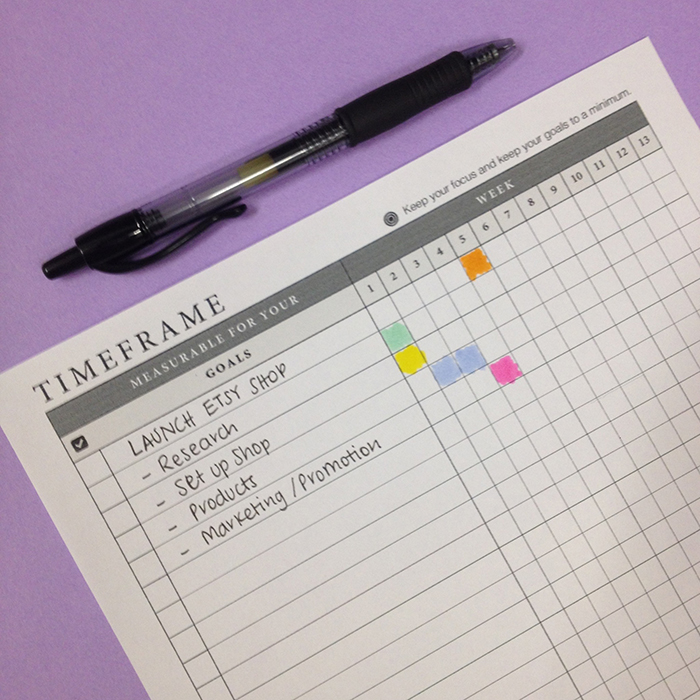
I started with the goal timeframe page, where I wrote the steps I would normally take for such a project, and I marked with different colours the week I would plan to tackle each step separately.
Then, I took the pages for the first two weeks and I started writing down what needed to be done for each step.
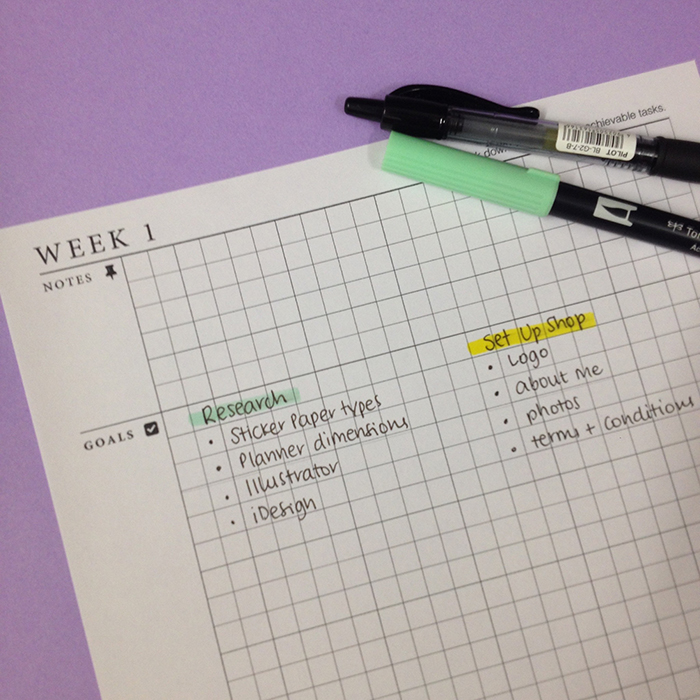

I have to say that while I was doing that, I felt really focused. I was able to plan ahead all the steps for each part of the project, give a timeframe within which each of them should be finished, and I could actually see the whole project unfold on paper. I also liked that everything has it's place, and I can easily find what I want. Also, there's lots of space for further steps or other things I might need to add later on.
Then I moved on the weekly page where I also planned a pretend day.

I was able to add my housework tracker and a to-do list for this week in the notes part. Then I drew a line to separate it from the day of the week. I chose to decorate it a bit using some of my stickers for the date, weather and water tracker. There was also space to create my daily plan bar on the left part, while on the right I made a list of the things I needed to do during that day.
All in all I really liked the format of the planner. I loved the simplicity of the system but also the flexibility of the pages. It allows you to use the page the way you want to. As you can see in the picture above, there is a line separating the space for each day, but if you need extra space like I did, you simply put an arrow facing downwards to indicate that you're using all the space for one day. That way there is no waste on the pages. Lastly, I really liked that I was able to customise the page the way I wanted and make it work for me. I chose stickers and coloured markers.
On the other hand, being a bullet journalist I missed my dots! Even though I like squares as well, I would love to have the option to chose a dotted format of the planner.

Features
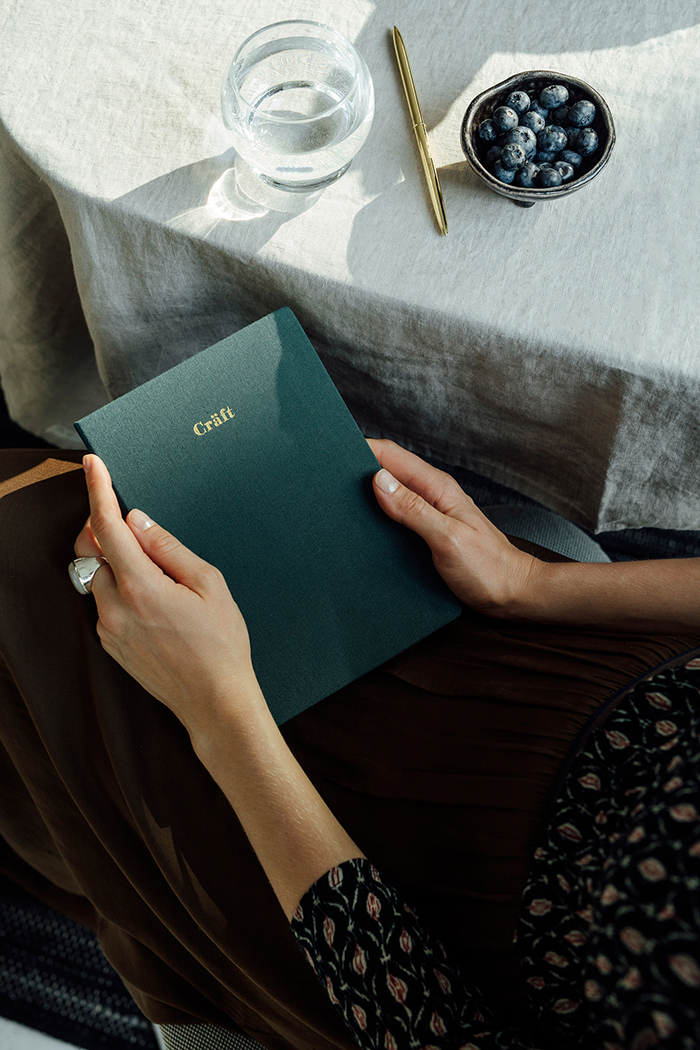
- The planner comes in A5 size (5.8" x 8.4”), with a luxurious cover made form premium fabric.
- On the website it shows that the planner comes in 5 different colours, but I'm hoping that more options will be added once they start selling it.
- It comes with premium 70gsm paper that promises the same opacity & thickness as standard 100gsm paper. I’d love to test that, and see if it’s true.
- It comes with 2x Bookmarkers (0.35cm width)
- It lays flat and allows seamless writing on every page.
- There is also an expandable inner pocket and an elastic band.
What’s inside the Craft Planner?
- 1 page for Personal Details
- 4 pages of break-down Demo
- 24 pages for the 12-Month Calendar (undated)
- 4 pages of 52-Weeks Timeframe Goals Checklists
- 208 pages of 52-Weeks Planner (undated)
How to get yours
The Craft Planner is currently on Kickstarter where they're doing a fundraising on this campaign. They are very close to their goal, but if you like the planner you can help them reach their goal even sooner! You can back this project and select a reward. This means that you are actually pre-ordering one or more of their Craft Planners. By doing so, you'll receive a discount especially designed for backers, and you will get hold of your planner before it hits the store shelves.
For more FAQ, click here.
You can also get a free digital version of the Craft Planner 2.0 preview.
I really liked the format and the system of the Craft Planner. Future planning and project planning with the bullet journal can be a bit tricky. So, I'd definitely use this planner specifically for my various projects and goals during the year. I can't wait to get my hands on it this December!
Have you heard of the Craft Planner before? What do you think of it?

